
I'm really excited for The Dainty Maker Box No. 5! This project is not only a special keepsake, but also an activity that is sure to ignite the imagination of your little one long after the glue dries.
These maker boxes are made to be done together, to encourage quality time, that's why I don’t put an age limit on these projects. Depending on how old your child is, you may need to tweak the steps slightly in order to make it fun for everyone.
This keepsake is meant to be kept for a lifetime, so we used two types of glue to help make that possible. My girls each use a low temp glue gun, which is warm, but not hot. (Here's the link to the glue gun.) We also used a tacky glue for some parts, which is best for use on fabrics. (This kind.)
*These glues can also be found at any craft store and are used for just about every maker box.
Be sure to tag @thedaintymaker on Instagram so I can see all your masterpieces!
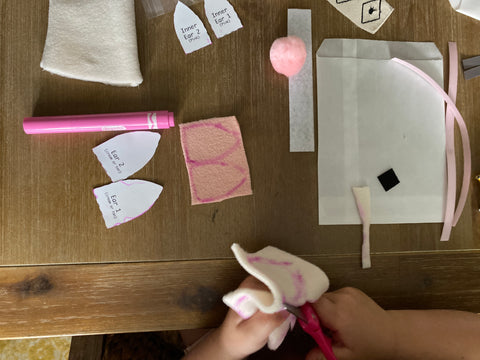
1. Lay out all materials/supplies. Pull up the Maker Box 5 visual guide on the blog.

2. Cut out pattern pieces.


3. Trace Inner Ear pattern onto blush fleece fabric. (A marker or pen works best)
4. Trace Outer Ear pattern onto tan (pony) or cream (unicorn) fleece fabric.


5. Cut out all four ear pieces. If you use a marker, be sure to cut on inside of marker line so that it can be seen on ear of puppet.

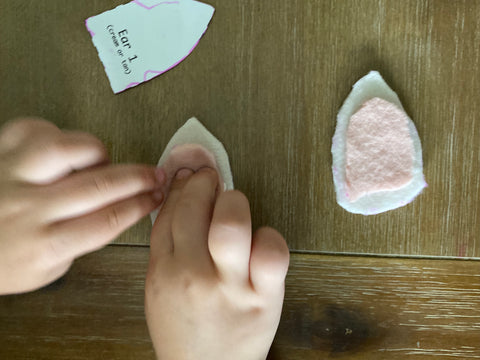
6. Glue blush Inner Ear onto Outer Ear pattern (Tacky glue works best). Pinch one side to center of ear. Hot glue in place. Repeat on other ear using the opposite side. Allow to dry.


Steps 7-11 for Unicorn Puppets only. For Pony Puppets skip to Step 12.
7. For Unicorns: Take mustard felt and roll into a cone shape. Hot glue along seam to secure closed. Allow to dry.


8. Fill cone horn with stuffing and carefully hot glue the bottom closed. Allow to dry.


9. Flip puppet inside-out and tuck horn into slit on top of head. Make sure horn seam is facing back of puppet.


10. Apply glue to the inside of the seams and pinch closed with clothes pin. 

Allow to dry. Once dry, remove clothes pin.
11. Flip puppet right-side-out and set aside.

12. Pick up knotted yarn on recycled cardboard. Holding the knotted side of the yarn in place, slide scissors through the loops directly across from the knot and cut. This will create the mane for your puppet.

13. Keeping the mane evenly divided, hot glue mane to the rectangular strip of stiff felt. Set aside.


14. Hot glue ear to the center, back seamline of puppet (pink side down and the fold facing forward). Repeat for other ear; taking care to align both. Allow to dry.


15. Insert recycled cardboard inside puppet along back seam to protect your hand from hot glue in next step.

16. Hot glue rectangular section of mane along the back seam of the puppet stopping on the top of head. Glue mane where needed to even out. 

17. Bend ears upward and glue inplace on yarn mane. Allow to dry.


18. Cut out eye patches leaving 1/8th inch of space around the black outline.


19. Flatten puppet on its side to place and glue eye patch (eyelash facing mane). Flip puppet and repeat.


20. Cut two thin strips off sticky black felt. Carefully glue one onto each side of the nose to make the snout. (Although its sticky already, I recommend adding hot glue for a permanent attachment.) 

21. Hot glue pom pom to ear to accessorize your puppet. Set aside. 
22. Pick up included fabric piece. Cut edge of fabric multiple times 3/4 of the way up to create fringe shawl.


23. Place fabric face down and hot glue ribbon to each end. Allow to dry.

24. Tie shawl around puppet’s neck.

You're finished. :) Great job! I hope you had fun with this one. The add-on possibilities are endless. Use your box to make a theatre or extra fabric scraps as additional accessories. Be sure to tag @thedaintymaker on Instagram to share your masterpiece!
.
xx,
Chrissy
Leave a comment